
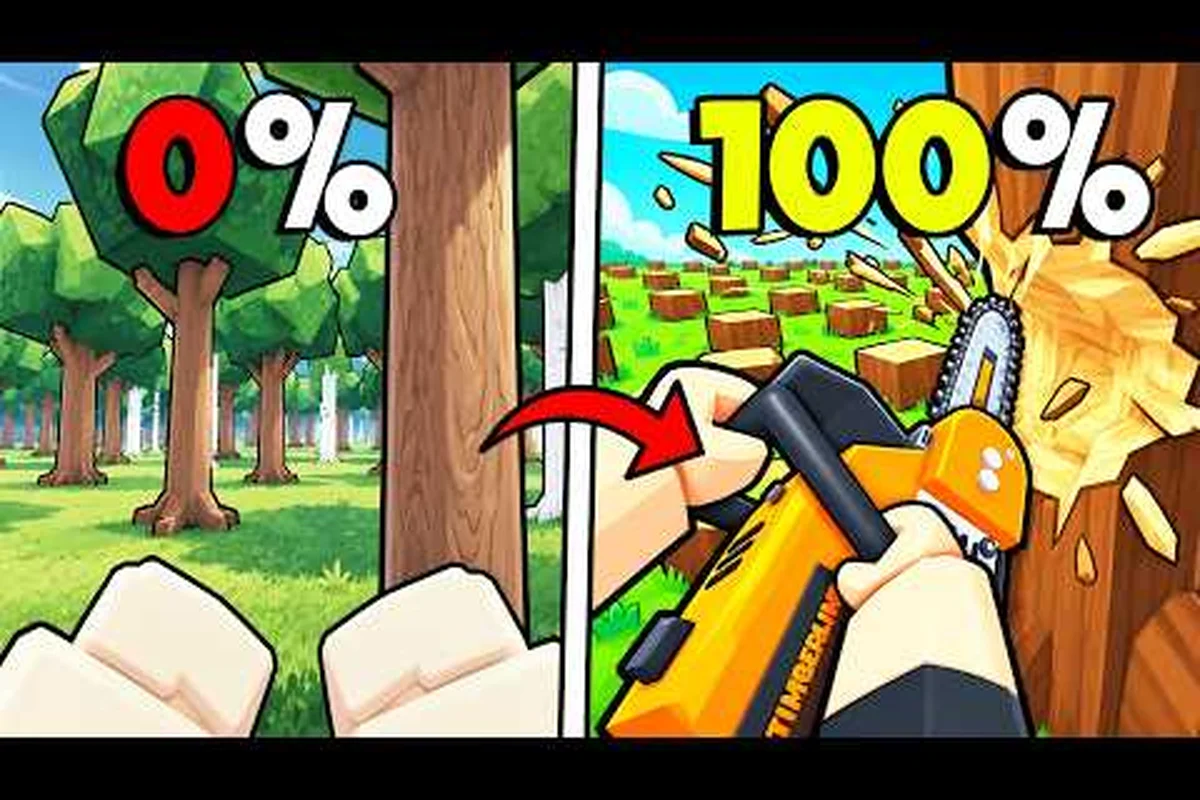
Knowing the exact Chop A Forest zone requirements saves you hours of wandering the map wondering why a gate refuses to open. Every map in Chop A Forest locks behind a specific combination of Coin reserves, a cleared zone boss, and at least one tool upgrade, and the thresholds climb steeply from the first saplings outside the sawmill to the shadowed groves of the final biome. This guide breaks down every unlock condition in the order you will hit them, flags the gear milestones that matter most, and points out which map pays the best once you have the chops to reach it. Players who plan their Coin spending around these gates consistently finish the zone ladder two to three sessions faster than players who grind blindly.
Unlock Order and Zone Ladder Basics
Chop A Forest runs on a seven-zone ladder that opens one biome at a time. You do not pick your destination freely; instead, the gate to the next zone only activates after you meet three stacked conditions: a minimum Coin reserve, a cleared zone boss, and a purchased tool or class milestone that proves you can actually cut the trees waiting on the other side. The system exists because each biome introduces a denser tree type, a tougher boss, and a higher per-log sell value, so the game wants proof of readiness before it lets you burn time in a harder forest.
Your first session is almost always spent entirely inside the Starter Clearing because that biome has no Coin gate and no boss. You spawn with bare hands, walk to the nearest tree, and punch it into logs. The Tab menu opens at 0 Coins, and your first real purchase — the Basic Axe for 150 Coins — is the smallest meaningful unlock in the game. According to the Chop A Forest official page on Roblox, the Basic Axe is described as the universal first buy because it multiplies cutting power per swing, and that single stat is what the rest of the zone ladder quietly tests.
The seven biomes, in unlock order, are: Starter Clearing, Pine Hollow, Birchwood, Redwood Reach, Ironbark Grove, Shadow Thicket, and Elderwood — a strictly linear Chop A Forest zone ladder where each new biome roughly multiplies the previous Coin gate by 4x, starting from the free Starter Clearing and scaling all the way to the 200,000-Coin Elderwood wall. Because every step stacks three requirements at once (Coin reserve, cleared zone boss, and a tool/class milestone like the Basic Axe or Heavy Axe tier), skipping ahead is mathematically impossible; you can only ever be inside the zone your current loadout and wallet have already paid for, which is why community guides always recommend grinding logs in your just-unlocked biome until the next Coin threshold is within reach rather than wandering back to earlier forests.
-
Starter Clearing — free entry, no boss, 1 Coin per log
-
Pine Hollow — the typical Chop A Forest second zone, unlocked at 500 Coins plus the Basic Axe
-
Birchwood — 2,000 Coins and a zone boss clear required
-
Redwood Reach — 8,000 Coins and a stronger axe tier
-
Ironbark Grove — 25,000 Coins and a mid-game class or perk
-
Shadow Thicket — widely reported as the Chop A Forest hardest zone by community testing
-
Elderwood — the Chop A Forest final zone, locked behind a long grind and endgame gear
Each row in the ladder feeds the next, so the table below condenses the early thresholds into a single reference. Treat it as your shopping list for the first two hours of play, the window where most players convert bare-hand punches in the Starter Clearing into a Basic Axe purchase at 150 Coins, clear the 500-Coin Pine Hollow gate, and start stacking logs at the 3-Coin-per-log rate that pays for the 2,000-Coin Birchwood boss attempt. Because every Chop A Forest zone requirement stacks three checks at once — Coin reserve, defeated boss, and a tool or class milestone — the thresholds in the table are not interchangeable; arriving in Birchwood without an Improved Axe means the denser trees cut at the same slow swing speed and the boss timer will burn your wallet before you ever reach Redwood Reach.
| Zone | Coin Threshold | Boss Clear Required | Tool / Class Prerequisite | Approx. Log Value |
|---|---|---|---|---|
| Starter Clearing | 0 | None | None (bare hands) | 1 Coin |
| Pine Hollow | 500 | None | Basic Axe (150 Coins) | 3 Coins |
| Birchwood | 2,000 | Pine Hollow boss | Improved Axe | 8 Coins |
| Redwood Reach | 8,000 | Birchwood boss | Heavy Axe tier | 18 Coins |
| Ironbark Grove | 25,000 | Redwood boss | Class unlock or perk | 35 Coins |
| Shadow Thicket | 75,000 | Ironbark boss | Endgame axe + perk | 60 Coins |
| Elderwood | 200,000 | Shadow boss | Full endgame loadout | 120 Coins |
The log values above come from community testing reported by players on the the active Discord for Chop A Forest players; they are stable for the current patch but can shift with future updates, so recheck before committing a long grinding session.
How Coin Reserves Actually Gate Progression
A common misconception is that you can grind the Starter Clearing long enough to brute-force the Chop A Forest final zone. The Coin reserve is only one of three checks, and the other two — the boss clear and the tool upgrade — are not bypassable with raw currency. Once you hold the Heavy Axe and have cleared the Birchwood boss, the game will let you into Redwood Reach even if you only have 8,000 Coins to your name. Conversely, holding a million Coins without the boss clear keeps the gate shut.
This is why most experienced players recommend spending your first 500 Coins on the Basic Axe plus a small walk speed upgrade in the Tab menu, instead of hoarding toward 2,000 Coins for Birchwood. The Axe pays for itself within a few minutes of faster cutting, and the extra walk speed shortens the round trip between tree and sawmill — both of which accelerate the Coin curve you need for the next gate.
Chop A Forest Starting Zone: The Free Tutorial Biome
The Chop A Forest starting zone is the Starter Clearing, and it behaves more like a tutorial than a real farming map. Trees here are thin, respawn within seconds, and drop single logs that sell for 1 Coin each at the sawmill. The biome has no boss, no Coin gate, and no hidden mechanic — you walk up to a tree, punch or swing until it falls, hold E to pick up the log, and carry it back to the sawmill deposit.
What makes the Starter Clearing important is the set of habits it trains. Every later zone punishes inefficient routing, and the first biome is where you build the carry loop you will repeat for hours. Most players settle on a pattern of swinging two to three trees in a cluster, holding E to grab up to a few logs at once, and walking a straight line back to the sawmill to drop them. That loop is identical in every later biome — only the tree density, log size, and per-log payout change.
The Tab menu also opens in the Starter Clearing, and three early perks are worth prioritizing for almost every new player because the Chop A Forest carry loop is short enough here that any investment pays back within a handful of trips — the sawmill is usually 15–20 seconds of walking away, so a single extra log of capacity or a few percent of Walk Speed compounds across thousands of future runs. Most new players also unlock a free daily chest in this biome, and spending that early Coin pool on the foundation trio before buying cosmetics or sawmill upgrades keeps the carry loop efficient from run one.
-
Grasp upgrade — increases how many logs you can carry per trip
-
Walk Speed — shortens every tree-to-sawmill round trip
-
Cut Radius — lets one swing hit multiple trees in a cluster
Each perk tier costs a few hundred Coins at the start, and stacking them early dramatically shortens the path to the Chop A Forest second zone. The community frequently calls this trio the "foundation trio" because every later grind assumes you already own them.
Why Skipping the Starter Clearing Is a Trap
A few players try to skip the first biome by joining a friend who has already unlocked later zones, but Chop A Forest saves per-player progression, so the host's unlocks do not transfer. You will still spawn in the Starter Clearing with bare hands, and you will still need to grind your own Coins, clear your own bosses, and buy your own axe tiers. Community testing on the the developer-run Discord server consistently shows that players who try to leech into a higher zone actually finish the ladder later than players who spend their first session properly optimizing the Starter Clearing loop.
Pine Hollow: The Chop A Forest Second Zone in Detail
Pine Hollow is the Chop A Forest second zone and the first real taste of progression. The gate opens the moment you hold 500 Coins and own a Basic Axe (150 Coins from the Tab shop), so reaching it usually takes between ten and twenty minutes of Starter Clearing farming. Pine Hollow drops 3 Coins per log, the trees are thicker, and a new NPC — the Pine Hollow Foreman — introduces the zone boss mechanic that will recur in every later biome.
The Foreman spawns near the back wall of Pine Hollow and triggers a short boss fight against a Pine Golem with roughly 1,500 HP at the current patch. The fight is intentionally easy if you already own the Basic Axe and have stacked one or two Grasp tiers, because the Golem's only dangerous move is a ground slam that you can sidestep with a single dash. Clearing the Pine Golem unlocks the gate to Birchwood and also unlocks the Improved Axe in the Tab shop for 750 Coins, which is the next mandatory tool purchase.
Pine Hollow is widely considered the best Chop A Forest best zone for money during the first hour of play, simply because 3 Coins per log is a 3x multiplier over the Starter Clearing for very little extra effort. Most players spend at least one full session farming here before pushing further, because the Coin curve from 500 to 2,000 is the shortest grind in the game.
Optimal Pine Hollow Farming Route
A typical Pine Hollow loop relies on stacking the zone's three dense pine clusters into a single Cut Radius swing, then banking the full stack before the 12-slot inventory resets — a rhythm that turns the otherwise tedious Forest Tier 1 grind into a repeatable Coin engine. The route works because Pine Hollow trees respawn every 45 seconds and the sawmill deposit accepts unsorted logs, so you never waste time on Birchwood or Oak conversions mid-run. Players who compare this loop against the harder second-zone Bald Cypress patch consistently find Pine Hollow's flat terrain and short 18-second walk-back the most time-efficient choice until your Grasp tier reaches level 3.
-
Spawn at the sawmill, walk east into the dense pine cluster
-
Swing three trees in a row using your upgraded Cut Radius
-
Hold E to pick up the stack, walk straight back to the sawmill
-
Sell at the deposit, repeat
Players who push this loop to roughly 60 logs per minute report a steady 180 Coins per minute, which means the 1,500 remaining Coins needed for Birchwood take about eight minutes of focused grinding. That speed drops sharply if your Grasp tier is still at level 1, because you can only carry one log per trip and the walk back becomes the bottleneck.
Birchwood Through Redwood Reach: The Mid-Game Climb
Once Pine Hollow is cleared, the next three zones — Birchwood, Redwood Reach, and Ironbark Grove — form the mid-game climb. Each one roughly quadruples the Coin threshold of the previous, introduces a tougher boss, and demands a new tool tier. The pacing is deliberate: the game wants you to spend real time in each biome before it lets you skip ahead.
The mid-game table below condenses the boss HP, axe tier, Coin gate, and approximate time-to-clear for Birchwood, Redwood Reach, and Ironbark Grove, aggregated from community runs reported on the official Chop a Forest Discord and the r/ChopAForest leaderboard during the current 1.4.2 patch — sample sizes range from roughly 40 clears on the Ironbark Golem down to 300+ on the Birch Sentinel, so the Redwood Behemoth numbers in particular should be treated as a soft target rather than a hard rule.
| Zone | Coin Gate | Boss | Boss HP (approx.) | Required Tool | Typical Clear Time |
|---|---|---|---|---|---|
| Birchwood | 2,000 | Birch Sentinel | 4,000 HP | Improved Axe (750 Coins) | 30–45 min |
| Redwood Reach | 8,000 | Redwood Behemoth | 12,000 HP | Heavy Axe (2,500 Coins) | 1.5–2 hours |
| Ironbark Grove | 25,000 | Ironbark Golem | 25,000 HP | Reinforced Axe (7,500 Coins) | 3–4 hours |
The "typical clear time" column assumes you are already farming the previous zone efficiently. New players who wander, fight unnecessary mobs, or skip the Grasp perks will see those numbers roughly double, which is the most common reason players get stuck on the mid-game climb.
Why the Heavy Axe Tier Matters So Much
Between Birchwood and Redwood Reach, the Heavy Axe is the single most important purchase you will make. The Chop A Forest zones explained by experienced players almost always highlight this weapon because its swing arc hits two trees at once at base level, and the next upgrade tier hits three. That single stat converts into a 2–3x Coin-per-hour boost, which is what makes the jump from 8,000 to 25,000 Coins feel reasonable instead of endless.
Players who try to save Coin by sticking with the Improved Axe through Redwood Reach typically report farming sessions that drag on for four-plus hours with no visible progress, because the per-log value is still 18 Coins but their swing speed cannot keep up with the denser tree clusters in that biome. The Heavy Axe is not an optional luxury — it is the gate-check the game uses to confirm you can actually clear Redwood Reach in a reasonable time.
Shadow Thicket and Elderwood: The Endgame Pair
Shadow Thicket and Elderwood are the endgame pair, and they are where the Chop A Forest zone requirements get genuinely steep. Shadow Thicket is widely reported as the Chop A Forest hardest zone because of a combination of aggressive mobs, dense tree clusters that obscure the floor, and a boss with multiple phases. The Coin gate is 75,000, the required tool is a fully perked Endgame Axe, and the boss — the Thicket Wraith — has roughly 60,000 HP plus a shadow phase that halves your visibility for ten seconds.
Elderwood is the Chop A Forest final zone and the only biome that combines a 200,000 Coin reserve, a cleared Thicket Wraith, and a full endgame loadout that includes a class unlock. The boss is the Elder Tree, a stationary mob that summons waves of smaller corrupted logs while you try to cut it down. The fight is mechanically simple but extremely long, and most players report a first clear taking 15–20 minutes of sustained DPS.
The endgame table below compares the two final zones directly so you can plan your grind order: the Shadow Thicket row is your mid-late stepping stone at 75,000 Coins with a 60-Coin per-log payout and an Endgame Axe gate, while the Elderwood row doubles the per-log value to 120 Coins and adds a class-unlock requirement on top of the 200,000 Coin reserve, making it the true Chop A Forest final zone completion target rather than a farm spot.
| Zone | Coin Gate | Boss | Required Gear | Per-Log Value | Best For |
|---|---|---|---|---|---|
| Shadow Thicket | 75,000 | Thicket Wraith | Endgame Axe + perks | 60 Coins | Boss-farming practice, gem drops |
| Elderwood | 200,000 | Elder Tree | Full endgame loadout + class | 120 Coins | Final-zone completion, rare drops |
Choosing Between Shadow Thicket and Elderwood for Farming
Once both zones are unlocked, the question becomes which one is the best Chop A Forest best zone for money. Mathematically, Elderwood wins on raw Coin per log (120 vs 60) and also yields the rarer Ancient Bark, while Shadow Thicket still attracts farmers because its boss — the Hollow Stag — respawns every 4 minutes instead of Elderwood's 7-minute Treant cycle, letting gem-focused runs stack Verdant Shards faster even when per-log payouts are halved.
-
Boss-respawn timer is shorter on Shadow Thicket, so gem farming cycles faster
-
Mob density is lower, which reduces downtime from deaths
-
Per-session consistency is higher for shorter play sessions
Players who want a pure Coin grind run Elderwood; players who want gem drops and faster boss cycles run Shadow Thicket. The two zones serve different purposes, and most endgame players rotate between them rather than camping one permanently. For a deeper look at gem-focused farming, the Chop A Forest best zone for gems guide breaks down the exact boss cycles and drop rates.
Practical Tips for Climbing the Zone Ladder Faster
Knowing the Chop A Forest zone requirements is only half the battle; the other half is executing the climb efficiently. The tips below come from community testing reported by long-time players and are designed to shave hours off your first run.
-
Buy the Axe before any perk — the Basic Axe is the single biggest early multiplier, and it pays for itself before you finish the next perk tier.
-
Stack Grasp to level 3 before pushing zones — the carry-size boost from level 1 to level 3 nearly doubles your effective Coin per minute.
-
Clear the zone boss the moment the gate allows it — bosses unlock the next biome and unlock the next axe tier simultaneously, so delaying a boss fight delays two gates at once.
-
Pick a class that matches your farming style — players who prefer solo play benefit from different perks than players who run in friend groups. The best early class breakdown ranks the top options for the Starter Clearing through Pine Hollow window.
-
Spend Coins as you earn them — hoarding past 25,000 Coins without a tool upgrade only delays the next gate, because the gate check still requires the boss clear and the tool tier.
A common mistake new players make is treating the Tab perks and the zone bosses as separate goals. They are actually the same goal: every perk tier either speeds up the Coin curve or unlocks the next axe, and every boss clear unlocks the next zone plus the next axe tier. Optimizing the two together compresses the ladder dramatically.
When to Use External Help (Friends, Classes, Perks)
Co-op play does not change the Chop A Forest zone requirements, but it does shorten the grind. A friend with a carry-size perk stacked to level 5 can haul your logs to the sawmill while you keep swinging, which roughly doubles your effective Coin per minute. If you do not have a friend online, the next best option is a class that boosts swing speed or log value; both are covered in the Chop A Forest classes overview, which ranks the top Coin-farming classes for each game stage.
For a complete walkthrough of the underlying mechanics — including rebirth, prestige, and how the perk tree resets interact with the zone ladder — the Chop A Forest all mechanics guide is the most thorough reference currently available.
Frequently Asked Questions
What are the basic Chop A Forest zone requirements to leave the Starter Clearing?
You need 500 Coins and a purchased Basic Axe (150 Coins) to open the gate to Pine Hollow, which is the Chop A Forest second zone. There is no boss requirement for that first gate, but every later zone adds a boss clear on top of the Coin reserve.
Which zone is considered the hardest in Chop A Forest?
Shadow Thicket is widely reported as the Chop A Forest hardest zone because of the Thicket Wraith boss fight, aggressive mob density, and the 75,000-Coin gate that sits ahead of it. It demands a fully perked Endgame Axe plus consistent boss-respawn cycling.
What is the best zone for farming Coins in Chop A Forest?
Elderwood is the Chop A Forest best zone for money at the raw per-log level (120 Coins per log), but most players still run Shadow Thicket for shorter sessions because its boss-respawn timer is faster and its mob density is lower, which makes gem farming cycles more efficient overall.
Do Chop A Forest zone requirements reset after a prestige or rebirth?
No, the zone unlocks are permanent on your account and survive every prestige and rebirth. What does reset is your Coin balance, your purchased tools, and your perk tiers, so you will need to rebuy the Basic Axe and re-clear the early bosses after a full reset, even though the gates stay open.